How to scarify a lawn
The Comprehensive Guide to Scarifying Your Lawn
Welcome to our comprehensive guide on lawn scarification, a crucial yet often overlooked aspect of lawn care. If you've ever wondered how to achieve that lush, green carpet of grass in your garden, then you're in the right place.
Scarifying your lawn might sound daunting, but with our step-by-step guide, you'll be a pro in no time. From understanding the importance of scarification to avoiding common mistakes, we've got you covered.
So, whether you're a seasoned gardener or a green-fingered newbie, stick around. We promise you'll learn something new about the art of lawn scarification. Let's dive in and transform your garden together.
Understanding Lawn Scarification
Diving into the world of lawn care, we encounter a crucial process known as scarification. This process, while initially appearing messy, is a vital step towards a healthier, more vibrant lawn. In this section, we'll delve into the nitty-gritty of lawn scarification, exploring what it is, why it's important, and how it works. So, grab your gardening gloves, and let's get started on understanding lawn scarification.
What is Lawn Scarification?
Lawn scarification, often referred to as 'scarifying', is a crucial part of lawn care. It's a process that involves vertically cutting through the lawn and the layer of thatch, which is a mix of decaying leaves and other plant materials. This is done using a scarifier, a tool equipped with rotating blades that penetrate a few millimetres into the soil.
The purpose of scarification is not to damage your lawn, but to rejuvenate it. The process might seem a bit messy at first, but it's beneficial in the long run. It helps in removing moss, thatch, and weeds, making it easier for air, water, and micronutrients to reach the roots of your grass.
Scarification is more intense than simply dethatching a lawn. It goes deeper, removing not just the surface layer of thatch but also any moss and deeper debris. This process helps to aerate your lawn, allowing it to breathe and absorb nutrients more effectively.
Whether you use a professional scarifying machine or a good old-fashioned rake for the task is entirely up to you. However, keep in mind that using a rake can be quite a tiring job, especially if you have a larger lawn.
In essence, lawn scarification is a vital process in maintaining a healthy, lush garden. It's a bit like giving your lawn a deep cleanse, removing all the unwanted elements and allowing it to breathe and grow better.
Why is Scarification Important for Your Lawn?
Scarification is a crucial part of lawn care. It's not just about maintaining a neat appearance, but it's also about ensuring the health of your lawn. When thatch, a layer of decaying plant material, builds up, it can suffocate the grassroots. This is where scarification comes in.
Scarifying your lawn helps to remove this thick layer of thatch. It's like giving your lawn a breath of fresh air. It allows essential elements like water, air, and nutrients to reach the soil, promoting healthier growth.
Moreover, scarification aids in moss and weed removal. If left unchecked, these can deprive your lawn of vital nutrients. By scarifying, you're giving your lawn a fighting chance against these invaders.
Additionally, scarification can rejuvenate tired-looking lawns. It helps your lawn grow green and thick, reducing the chances of moss development in the future. It's a way to ensure your lawn stays lush and vibrant.
Lastly, scarification can help reduce soil compaction, allowing your lawn to breathe and grow better. So, if you want a healthy, thriving lawn, scarification is a must.
How Does Scarification Work?
Scarification is a process that involves cutting through the lawn and thatch layer, scoring the surface of the soil. This is achieved using a scarifier, a tool equipped with rotating blades that penetrate a few millimetres into the ground. The blades work to remove moss, thatch, and weeds, which can hinder the health of your lawn.
The process may initially seem messy, but it's a necessary step for long-term lawn rejuvenation. By scarifying, you're making it easier for air, water, and micronutrients to reach the roots of your grass. This is crucial for the overall health and appearance of your lawn.
Before scarifying, it's important to mow the lawn to a height of around 2 to 3 cm. The scarifying blades should be adjusted to the correct depth to avoid damaging the turf. The scarifier should be moved quickly and evenly over the lawn, working in one direction before turning 90 degrees and covering the area again.
After scarifying, any loosened thatch should be removed with a rake. This is especially important if you're using a tool without a grass catcher box. The final step is to fertilise and top dress the lawn with sand or compost to encourage healthy growth.
In essence, scarification is a vital part of lawn care that ensures your garden remains lush, green, and healthy.
When to Scarify Your Lawn
Understanding when to scarify your lawn is crucial for maintaining its health and vibrancy. The timing can significantly impact the effectiveness of scarification and the overall condition of your lawn. This section will guide you through the best times of the year for scarification and when it's best to avoid this process. Let's delve into the details to ensure your lawn gets the care it deserves.
Best Time of the Year for Scarification
The best time to scarify your lawn largely depends on the condition of your turf and the weather. Generally, spring and early autumn are considered ideal for this task.
In spring, around April, the growth and recovery rate of your lawn is at its peak. This makes it a perfect time for light scarification or thatch removal. If you miss this window, early autumn, specifically late August or early September, is another good opportunity.
For lawns under constant shade, late March through April is the best time to rake. This is when tree crowns are at their thinnest, allowing maximum sunlight for optimal growth.
If your lawn requires heavy scarification, autumn is your best bet. This is when you can effectively remove thatch without leaving your soil vulnerable to weed invasion.
Remember, timing is crucial. Scarifying at the wrong time can lead to more problems and may even prevent your lawn from recovering.
When Not to Scarify Your Lawn
Avoiding the wrong time for scarification is as crucial as knowing the right time. Scarifying your lawn during the summer months, particularly June, July, and August, is a big no-no. The heat and dry conditions slow down grass recovery, leaving your lawn vulnerable and parched.
Similarly, winter scarification, from November to February, can be disastrous. The grass goes dormant in the cold, and any raking can expose your soil to harsh weather, leading to frost heave and moss invasion.
March may seem tempting with its warmer temperatures, but the soil is still recovering from winter's chill. It's best to use this time for planning and pre-treatment, like applying weed killer.
Scarifying during wet weather or on a boggy lawn can also cause more harm than good. It's best to wait for the rain to pass and the lawn to dry before you start scarifying.
Remember, the goal is to improve your lawn's health, not damage it. So, always consider the time of year and weather conditions before you scarify.
Tools Required for Scarifying a Lawn
To achieve a healthy, vibrant lawn, scarifying is a crucial process. This section will delve into the essential tools required for scarifying a lawn. From manual rakes to electric scarifiers, we'll explore the pros and cons of each tool, helping you make an informed decision for your lawn care routine. Remember, the right tool can make the difference between a laborious task and a smooth, efficient process.
Choosing the Right Scarifier
Choosing the right scarifier for your lawn is crucial to ensure effective scarification. The size of your lawn is a key factor in this decision. For smaller lawns, a manual scarifier might suffice.
However, for larger lawns, a powered scarifier, either cordless or petrol-driven, is recommended. These machines can handle larger areas and make the process less laborious.
Remember, the scarifier's blades should be sharp and adjustable. This allows you to control the depth of scarification, preventing damage to your lawn.
Also, consider the noise level if you have nearby neighbours. Battery-powered scarifiers are quieter and ideal for lawns up to 250m2.
In conclusion, choosing the right scarifier is about balancing your lawn's needs with your physical capabilities and the tool's efficiency.
Using a Rake for Scarification
Scarifying your lawn with a rake is a viable option, especially if you're dealing with a smaller garden. This method, while labour-intensive, can be effective in removing thatch and moss.
However, it's important to note that using a rake for scarification can be physically demanding. It requires a good deal of effort and can be time-consuming, particularly for larger lawns.
Before you start, ensure your lawn is free of any debris like sticks or rocks that could interfere with the process. Mow your lawn to about 1 inch in height and collect any clippings.
When scarifying, move the rake in parallel lines, overlapping each pass slightly. After scarifying, collect the debris with the rake.
Remember, scarifying with a rake is a manual process and may not be as thorough as using a scarifier. However, it can still be a beneficial method for maintaining the health of your lawn.
Electric Scarifiers: Pros and Cons
Electric scarifiers are a popular choice for many homeowners due to their efficiency and ease of use. They are particularly beneficial for larger lawns, where manual scarification can be a laborious task.
However, they do come with their own set of considerations. One of the main advantages of electric scarifiers is their power. They can quickly and effectively penetrate the soil, removing thatch and aerating the lawn. This can save you a significant amount of time and effort compared to manual methods.
On the downside, electric scarifiers can be more expensive than a simple rake. They also require a power source, which can limit their mobility in larger gardens.
Another potential drawback is the noise. Electric scarifiers can be quite loud, which may not be ideal if you have close neighbours or prefer a quiet gardening experience.
In conclusion, while electric scarifiers offer many benefits, it's important to weigh these against the potential drawbacks before making a decision.
Step-by-Step Guide to Scarifying Your Lawn
Embarking on the journey to scarify your lawn? Our step-by-step guide is here to help you navigate this process with ease. From preparation to the actual scarification and post-care, we've got you covered. Let's dive into the world of lawn scarification and discover how you can achieve a lush, healthy lawn.
Preparing Your Lawn for Scarification
Before you begin the scarification process, it's crucial to prepare your lawn adequately. Start by mowing your lawn to a height of around 2 to 3 cm. This step is essential as it allows the scarifier blades to reach the soil surface effectively.
Next, ensure that your lawn is free from any debris such as sticks, rocks, or large stones. These can interfere with the scarification process and potentially damage your scarifier.
It's also important to consider the timing of your scarification. Ideally, this should be done in spring when temperatures are consistently above 10°C and the grass is growing vigorously.
Remember, if your lawn is newly laid, it's best to wait at least three years before scarifying to avoid damaging the young grass roots.
Finally, keep in mind that scarification can be a messy process. So, be prepared to clean up the loosened thatch afterwards with a rake or a tool with a grass catcher box.
Setting the Depth of Your Scarifier
Setting the depth of your scarifier is a crucial step in the scarification process. The depth should be determined based on the age of your lawn and the extent of matting.
As a general rule, the blades of the scarifier should not rip open the ground, but rather lightly skim the soil surface. This means adjusting the blades to penetrate the ground to a depth of 2 to 3 mm.
You can test this depth on a small section of your lawn and readjust if necessary. If your lawn has been neglected for a while, it may be able to handle a depth of 4 mm.
However, to avoid causing permanent damage to your lawn, never set the scarifier to go deeper than this. Remember, scarifiers have very sharp blades, so it's important to ensure they are correctly adjusted before you start.
Incorrect blade positioning can lead to severe damage to your lawn, so take the time to get this step right.
The Scarification Process
The scarification process is a crucial step in maintaining your lawn's health. It involves two passes over your lawn with a scarifier. In the first pass, you should work the scarifier lengthwise across your lawn. This helps to cut through the thatch layer and expose the soil beneath.
In the second pass, turn your scarifier 90 degrees and work it across your lawn again. This crosswise pass helps to further break up the thatch and moss, allowing for better aeration and irrigation of your lawn.
Remember to move quickly and evenly over your lawn during both passes. Pausing can cause damage to the turf. Also, ensure there are no large stones in the path of the scarifier as they can damage the blades.
This process might seem laborious, but it's essential for the health of your lawn. It helps to remove the thick layer of thatch that can suffocate your grass roots and prevent moisture and nutrients from reaching them.
In the end, the scarification process is a small price to pay for a lush, healthy lawn.
What to Do After Scarifying
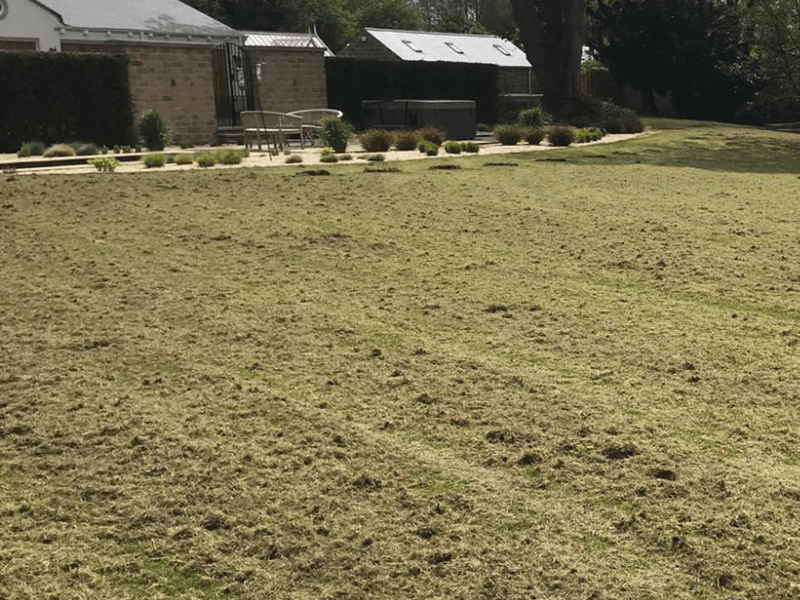
After the scarification process, your lawn may initially appear less appealing, but don't worry. This is a temporary phase and soon, you'll witness a lusher, more vibrant lawn.
The first step post-scarification is to remove the loosened thatch. If your scarifier doesn't have a grass catcher box, use a rake to do this.
Next, it's time to nourish your lawn. Apply a layer of sand or fine compost, followed by a good quality fertiliser. This will replenish the nutrients in the soil and promote healthy grass growth.
If you notice larger bare patches on your lawn, overseeding is recommended. This involves spreading grass seeds over the existing lawn to fill in the bare spots and create a denser, greener lawn with So & Mo Grass Seed.
Remember, the key to a beautiful lawn is consistent care and maintenance. So, keep an eye on your lawn's health and scarify it as needed.
Common Mistakes to Avoid When Scarifying
Scarifying your lawn can be a daunting task, especially for beginners. However, the most common pitfalls can be easily avoided with a little knowledge and preparation. In this section, we'll discuss some of the most common mistakes people make when scarifying their lawn, from timing issues to incorrect tool usage and neglecting aftercare. By understanding these potential pitfalls, you can ensure a successful scarification process and a healthier, more vibrant lawn.
Scarifying at the Wrong Time of Year
Scarifying your lawn at the wrong time of year is a common mistake that can lead to disastrous results. The timing of scarification is crucial to the health and recovery of your lawn.
Winter months, for instance, are a no-go zone for scarifying. The cold weather can cause your grass to go dormant and expose your soil to harsh conditions, leading to frost heave and moss invasion.
Similarly, the hot summer months are not ideal for scarifying. The heat can slow down grass recovery and leave your soil vulnerable to drought.
Spring, particularly April, is often the best time for light scarification. The warmer weather and high growth rate of your lawn make it an ideal time for this process.
Remember, timing is everything when it comes to scarifying your lawn. Avoid making this common mistake to ensure a healthy and vibrant lawn.
Incorrect Use of Scarifying Tools
Scarifying your lawn can be a tricky task, especially if you're not familiar with the correct use of scarifying tools. One common mistake is setting the blades too deep. This can cause severe damage to your lawn, as it can rip out healthy grass along with the thatch and moss.
Another error is rushing the process. Scarifying requires a steady, even pace. Moving too quickly can result in uneven scarification, leaving patches of your lawn untouched. Conversely, pausing for too long in one spot can lead to over-scarification, damaging the turf.
It's also crucial to ensure your lawn is free of large stones or debris before you begin. These can obstruct the scarifier, potentially causing damage to the tool and your lawn.
Lastly, remember that scarifying tools are not a one-size-fits-all solution. Smaller lawns may benefit from a simple rake, while larger lawns often require a professional machine for efficient scarification.
Avoid these mistakes to ensure your scarification process is effective and your lawn remains healthy and vibrant.
Neglecting Aftercare
Neglecting aftercare is a common mistake that can undermine your scarification efforts. After scarifying, your lawn may look a bit rough, but don't panic. This is normal and part of the process.
The key is to provide your lawn with the necessary nutrients and care it needs to recover. This includes applying a good quality fertiliser and watering your lawn regularly.
Avoid walking on your lawn as much as possible during this recovery period. This will prevent any unnecessary damage to the newly exposed grass roots.
If you notice any bare patches, consider overseeding. This will help to fill in these areas and promote a thicker, healthier lawn.
Remember, patience is key. It may take a few weeks for your lawn to fully recover, but with proper aftercare, your efforts will be rewarded with a lush, green lawn.
Professional Tips for a Perfectly Scarified Lawn
Ready to transform your lawn into a lush, green paradise? Our professional tips for a perfectly scarified lawn will guide you through the process. From expert advice on scarification to maintaining your lawn post-scarification, we've got you covered. Let's dive in and learn how to scarify your lawn like a pro.
Expert Advice on Scarification
Scarifying your lawn is a crucial task that requires careful planning and execution. Here are some expert tips to ensure a successful scarification process.
Firstly, mow your lawn to a height of around 2 to 3 cm before scarifying. This allows the scarifying blades to reach the soil surface effectively.
Secondly, adjust the scarifying blades to the correct depth. Remember, the goal is to score the ground, not to dig too deeply. The blades should penetrate the soil by no more than three to four millimetres.
Thirdly, work the scarifier lengthwise and then crosswise over the lawn. This ensures an even scarification process across the entire lawn.
Lastly, after scarifying, it's essential to fertilise and top dress the lawn with sand or compost. This aids in the recovery and growth of your lawn, leading to a healthier and more vibrant green space.
Maintaining Your Lawn Post-Scarification
After scarifying your lawn, it's crucial to aid its recovery. Start by eliminating any remaining moss. This will prevent it from suffocating the grassroots and hindering their growth.
Next, apply lawn grass seed and fertiliser. This will help to thicken your lawn, making it lusher and more beautiful. Remember, a healthy lawn is a thick lawn.
When your lawn reaches a height of around 2-3 inches, it's time to mow. But be careful not to cut more than 1 inch off each time. This will prevent your lawn from undergoing too much stress.
Carlos, a lawn care professional, emphasises the importance of this step. He says, "Once you have a healthy lawn, you don’t want to ruin it by putting it under too much stress."
In conclusion, maintaining your lawn post-scarification is just as important as the scarification process itself. Follow these tips to ensure your lawn recovers well and thrives.
Frequently Asked Questions About Lawn Scarification
Diving into the world of lawn care, we often encounter questions that need expert answers. In this section, we'll address some of the most frequently asked questions about lawn scarification. From understanding the right time to mow your lawn post-scarification to knowing if you can over-scarify, we've got you covered. Let's unravel these lawn care mysteries together.
When Should You Mow Your Lawn After Scarifying?
After scarifying your lawn, it's crucial to give it some time to recover. The grass may initially appear distressed, but this is a normal part of the process.
You should wait until you see new growth appearing before you mow your lawn again. This typically takes about two weeks, depending on the weather and the health of your lawn.
Remember, the goal is to allow the grass to recover and grow back stronger. Mowing too soon can hinder this process and cause unnecessary stress to your lawn.
So, be patient and let nature take its course. Your lawn will thank you for it with lush, healthy growth.
In conclusion, the best time to mow your lawn after scarifying is when you see new growth, usually around two weeks after the process.
Can You Scarify a Lawn Too Much?
Yes, it's possible to scarify a lawn too much. Over-scarification can lead to damage, especially if the blades penetrate too deeply into the soil.
The ideal depth is around 2 to 3 millimetres. Going deeper than this can harm the grass roots and cause long-term damage to your lawn.
Also, scarifying more than twice a year can be excessive. It's best to assess the condition of your lawn and the amount of thatch before deciding on the frequency of scarification.
Remember, a healthy, well-maintained lawn may not require scarification at all. Instead, a simple rake to dislodge dead grass might suffice.
So, while scarification can be beneficial, it's crucial to do it correctly and not overdo it.
Final Thoughts on Lawn Scarification
In conclusion, the process of scarifying your lawn is a crucial aspect of maintaining a healthy, vibrant green space. It may seem like a daunting task, but with the right tools and understanding, it can be a straightforward and rewarding process. Remember, the key to successful scarification lies in timing, correct use of tools, and diligent aftercare. Don't be discouraged if your lawn looks a bit rough immediately after scarifying; this is a normal part of the process and your lawn will soon recover, looking healthier and more lush than ever before. So, don't hesitate to scarify your lawn, it's a small effort for a big reward. Happy scarifying!
About So & Mo
So & Mo have over 30 years of experience in maintaining some of the best garden lawns in the country. We produce a variety of high-quality products that will help you maintain your garden in top shape, including lawn feed, moss and weed control, and grass seed.
Find out more about our products here or find further advice on how to care for your lawn on our blog.
Ready to be proud of your garden?
Ensure your lawn never goes hungry with our personalised feeding plan. Delivered through you letterbox exactly when you need it.


